
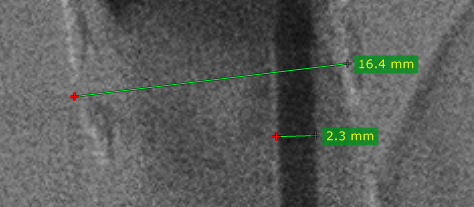
从“ 测量” 下拉菜单中选择“ 长度 ” (或按 L 键)。
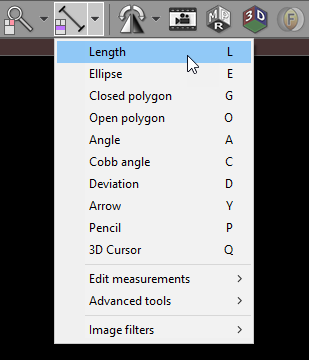
将光标放在起点上,然后按鼠标左键并拖动鼠标以绘制带有长度测量值的线段。释放按钮以完成绘图。
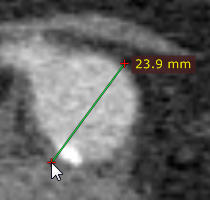
距离值将以毫米或像素显示(当图像文件中不包含校准数据时)。
您可以通过在按住鼠标左键的同时拖动来移动整个段或其结尾之一。
如果需要,也可以将标签拖到更方便的位置。
绘制线段时按 Shift键 可以使其垂直或水平。
默认情况下,长度测量工具与鼠标的前进(第5个)按钮关联。
绘制线段时按 Esc键 可将其删除。
测量校准
根据校准数据的来源,带有测量值的标签将以不同的颜色显示:![]()
校准了测得的距离(存在像素间隔元素)。
使用估计的射线照相放大率来计算距离。![]()
该距离是在探测器平面上测量的。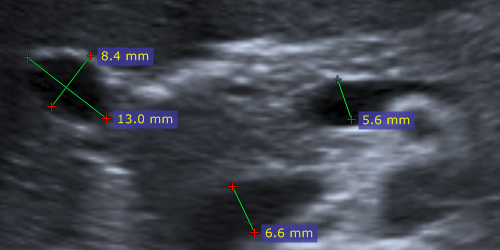
使用超声区域校准。
手动校准由用户执行。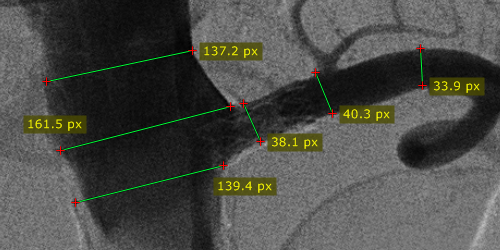
没有可用的校准数据(以源DICOM图像的像素为单位进行测量)。
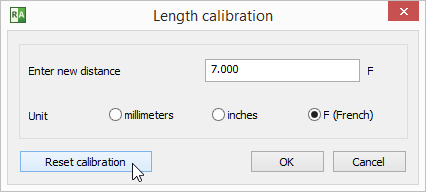
手动校正
可以手动校准图像(如果DICOM文件中没有校准数据)或重新校准。
1)测量已知大小的对象,然后右键单击线段或其标签以显示一个弹出菜单。
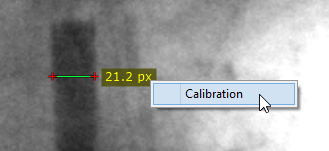
2)单击 校准 以打开对话框窗口。输入距离并选择单位(毫米,英寸或法国尺寸),然后单击 确定 以重新校准图像。
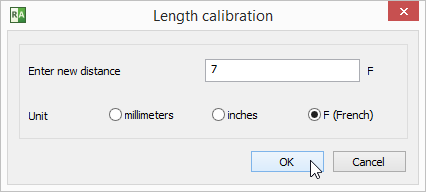
3)现在,将使用手动校准数据进行测量,并以毫米为单位显示。
要还原手动校准,请显示“校准”窗口,然后单击“ 重置校准” 按钮。
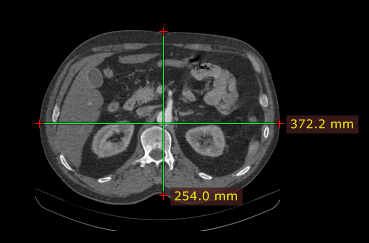
美国(超声)图像中的测量
来自超声设备的DICOM图像通常包括校准区域。根据区域类型,可以测量不同的参数。
以下是示例屏幕截图,显示了距离,速度和时间的度量。
